 DREFLY
How to Integrate Drefly Into Your Company
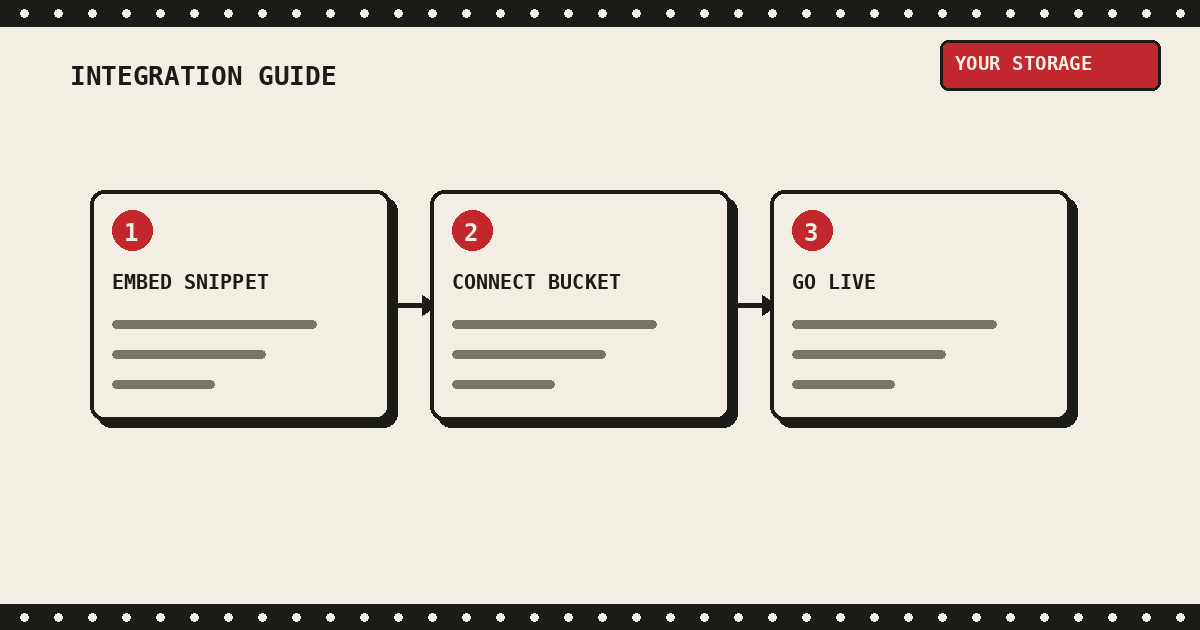
This is the follow up to Why Use Drefly's Record Tool for Your Company. That post covers what the widget does and why. This one is the walkthrough: every screen, every field, and every setting you'll actually touch to get a customer facing recording widget live on your site, connected to storage you control. Assume zero prior context. By the end you'll have a working embed and a first test recording sitting in your own bucket.
The widget itself is completely free, no cost, no payment wall, and no limits on recordings or seats. It embeds on almost any website or stack, plain HTML, React, Angular, WordPress, Shopify, Webflow, or anything else, with a single script tag. Because every recording uploads straight into a bucket or drive your company owns, you own all of the data end to end, Drefly never keeps a copy.
Before you start
You'll need two things ready before you open the dashboard: a domain (or a few) where the widget will run, and access to an S3 compatible storage bucket, either one you already have or a new one you create for this. Amazon S3, Cloudflare R2, Backblaze B2, DigitalOcean Spaces, Wasabi, Google Cloud Storage, MinIO, and any other S3 compatible provider all work. If you don't have a bucket yet, create an empty one now in whichever provider you use, you'll point Drefly at it in a few minutes.
Unlock the developer dashboard
Go to developer.drefly.pro. There's no separate signup form for this. If you already have a Drefly account secured with a passkey, the same passkey unlocks the developer dashboard, click Unlock with passkey. If this is your first time on this device, click Set up a new passkey instead, your browser or device will walk you through creating one (fingerprint, face, or device PIN, whichever your device offers). There's no password to invent, and nothing to remember beyond the passkey your device already manages for you.
Add a company
Once you're in, click Add a company. Each company is its own widget: its own domain, its own branding, and its own storage bucket, so recordings from one company never end up in another company's storage. Fill in:
- Company name - shown in the widget's UI text (things like "Recording for Acme Inc") and used to build the storage folder structure for that company's recordings.
- Allowed domains - the domain, or domains, the widget is allowed to run on. Add
one at a time and press Add or Enter after each. A bare domain like
app.company-a.comonly matches that exact host, a wildcard like*.company-a.commatches every subdomain. You can add up to 15 domains on a single widget, useful if you run staging and production on different subdomains. - Brand color - defaults to
#4f46e5. Set it to your own color and it runs through every button and accent in the widget. Leave it and the widget tries to detect a color from your site's owntheme-colormeta tag or primary buttons instead of using the default. - Widget records - choose what gets captured: screen, camera, and mic; screen and mic only; or screen only.
- Logo URL - optional, a direct link to an image file. It appears in the widget's header wherever your brand color does.
- Icon URL - optional, a direct link to an image file. Replaces the default record indicator on the button itself, so the floating or mounted icon can match your own product's iconography instead of Drefly's plain dot.
Default placement: floating button
Leave Place the icon inside an existing element blank in the dashboard and the widget shows as a floating button in the bottom right corner of every page it loads on. It automatically shifts position if it detects an existing chat widget already parked there (Intercom, Crisp, Drift, Tawk, Zendesk, HubSpot, and Freshchat are all recognized automatically), so this is the setting most companies leave as is. There's nothing to add to your markup for this mode, the embed snippet in the next section is all you need.
Mounting into an existing container
If you'd rather the recorder show up as a small icon inside something you already have, like a support widget's header bar, give a CSS selector for that container in the Place the icon inside an existing element field instead of leaving it blank. Say your page already has a header bar like this:
<div id="chat-header" class="chat-header">
  <span>Support</span>
</div>
Enter #chat-header in that field, and the recorder icon mounts inside that element
instead of floating, sized and positioned to sit alongside whatever else is already in there. Any
selector your browser's document.querySelector can resolve works, an id, a class, or a
more specific selector like .support-widget .header-actions.
If that container sits inside an iframe on your own domain, for example a support widget that
renders itself in an <iframe>:
<iframe id="chat-widget" src="/support-widget.html"></iframe>

<!-- inside support-widget.html -->
<div id="chat-header" class="chat-header">
  <span>Support</span>
</div>
fill in both fields: #chat-header for the container itself, and
iframe#chat-widget in the field below it for the iframe that contains it. This only
works when the iframe is on your own domain, since third party iframes are blocked by the browser
from the outside, and the widget falls back to the floating button automatically when it can't reach
in.
Click Save company. Your new widget now exists, though it isn't connected to storage yet, that's the next step.
Verifying placement worked
After you save and the embed snippet is live, load the page and watch the bottom right corner. The widget shows the default indicator right away, in your saved brand color once that loads, and settles into your custom icon a moment later if you set one. Nothing sits half loaded.
If you gave a mount selector, the widget also watches that container on its own. If the container gets removed from the page, for example a chat panel that closes and unmounts its contents, the widget automatically drops back to the floating button instead of disappearing, and moves back into the container once it's present again. If you see the floating button and expected the icon inside your container instead, the selector never resolved in the first place. The two most common reasons:
- The container only renders after a click, for example inside a chat panel that starts closed. Add the container to markup that's always present on the page, such as the header, even if it's empty until your own script fills it in later.
- The container lives inside an iframe from a different domain. Point the widget at a container on your own page instead, or check with that provider for a placement API.
Embed the snippet
Find the company you just added and click Get snippet. You'll get a single line to
paste onto your site, right before the closing </body> tag works well:
<script src="https://drefly.pro/widget/embed.js" data-key="YOUR_PUBLIC_KEY" defer></script>The data-key value is specific to this company's widget, it's how the script knows
which configuration, branding, and storage bucket to use, and it's checked against the allowed
domains you set earlier. Paste the snippet on every page you want the recorder available on, or drop
it in a shared layout or template so it loads everywhere at once. There's no build step, no package
to install, and nothing else to configure on the code side, the script reads its own configuration
from your dashboard settings at load time.
Running a Content Security Policy? Allowlist *.drefly.pro in
script-src, connect-src, img-src, media-src,
font-src, and worker-src at minimum. The widget loads vendor bundles like
drefly-media-codec.js and drefly-media-processor.js from our CDN, calls
back to drefly.pro for its own API, and may load assets from our storage, a strict CSP
without that allowlist blocks the widget from loading or from reaching the API at all. This is a
different header from Permissions-Policy, covered in
Allow camera and microphone in your headers below, and it fails
loudly: you'll see the widget simply not appear, along with a CSP violation in the console.
Connect your storage bucket
Back in the dashboard, click Connect their storage on the company you added. Recordings upload straight into this bucket, Drefly's own servers never keep a copy. You can paste a bucket URL into the quick fill field at the top and it'll try to detect the bucket name, region, and endpoint for you, or fill the fields in yourself:
- Bucket - the bucket name exactly as it appears in your provider's console.
- Access key ID and Secret access key - a key pair with permission
to write to that bucket. Where to get these depends on your provider:
- Amazon S3: IAM, then Users, your user's Security credentials tab, Create access key. The secret is only shown once, right after creation, copy it before closing that screen.
- Cloudflare R2: R2 in your Cloudflare dashboard, Manage R2 API tokens, Create API token. The account ID already shown in your R2 settings is not the access key, use the token's own key and secret.
- Backblaze B2: App Keys, Add a New Application Key. The keyID is your access key, the applicationKey shown right after is your secret.
- DigitalOcean Spaces: API in your control panel, Spaces Keys, Generate New Key.
- Wasabi: Access Keys in the Wasabi console, Create New Access Key.
- Google Cloud Storage: Cloud Storage settings, Interoperability tab, Create a key.
- MinIO: Access Keys in your MinIO console, Create access key.
- Any other S3 compatible provider: look for an API or access keys section in that provider's dashboard.
- Object prefix - defaults to
drefly-widget. Recordings are organized under this prefix automatically by company and date, change it if you want this company's files to land in a specific existing folder in the bucket. - Region and Endpoint - hidden by default under "Not Amazon S3?
Set region or endpoint". Leave both blank for Amazon S3. For everything else, set the endpoint to
your provider's S3 endpoint:
- Cloudflare R2:
https://<account-id>.r2.cloudflarestorage.com - Backblaze B2:
https://s3.<region>.backblazeb2.com - DigitalOcean Spaces:
https://<region>.digitaloceanspaces.com - Wasabi:
https://s3.<region>.wasabisys.com - Google Cloud Storage:
https://storage.googleapis.com - MinIO or a self hosted provider: whatever endpoint URL your instance runs on
- Cloudflare R2:
Click Verify and save. Drefly makes a real request to your bucket with the credentials you entered before saving anything. If the bucket, region, endpoint, or keys don't line up, you'll get an error telling you to double check them rather than a config that silently fails later. Once it succeeds, your widget is fully live, recordings sent through it from now on land directly in this bucket.
Troubleshooting: "Verify and save" fails
Almost every failed verification comes down to one of a handful of causes. Work through these in order before anything else, most of the time it's the second or third one.
- The key doesn't belong to the identity you think it does. Amazon S3 in
particular lets you create access keys under the account root user, not just under an IAM user. A
root key will pass Drefly's verification because root can do anything, which can hide a permissions
problem you'll only find later when you try to lock things down. Use an IAM user's key, not a root
key, and confirm which one you actually pasted in by running
aws sts get-caller-identitywith it, theArnin the response tells you exactly who this key belongs to. - The access key ID isn't active for that user anymore. Keys get regenerated,
rotated, or deleted, and it's easy to paste an old one from a password manager or an old terminal
scrollback. In the AWS console this is IAM, Users, your user, Security credentials tab, where every
key's status (Active or Inactive) is listed. Via CLI:
aws iam list-access-keys --user-name
                  YOUR_USER
. If the key you gave Drefly isn't in that list at all, or shows as Inactive, that's your answer. - The user has no permissions attached. This is the most common cause by far. A
freshly created IAM user starts with zero permissions, full stop, even a correct and active key
will fail on every S3 call until a policy is attached granting it access. Check with
aws iam list-attached-user-policies --user-name YOUR_USERandaws iam list-user-policies --user-name YOUR_USER, both empty means nothing is granted. Attach a policy scoped to just the bucket Drefly needs:
{
  "Version": "2012-10-17",
  "Statement": [
    {
      "Effect": "Allow",
      "Action": ["s3:PutObject", "s3:GetObject", "s3:ListBucket"],
      "Resource": [
        "arn:aws:s3:::your-bucket-name",
        "arn:aws:s3:::your-bucket-name/*"
      ]
    }
  ]
}- The bucket policy explicitly denies the request. A bucket level policy with an
explicit
Denyoverrides anything the IAM user's own policy allows. Check withaws s3api get-bucket-policy --bucket YOUR_BUCKET("no bucket policy exists" is fine, it means this isn't the cause). Watch for conditions likeaws:MultiFactorAuthPresent, a policy that requires MFA context on every request will deny a long lived access key and secret every single time, since that pair never carries MFA context, no matter how correct the credentials are. - Region or endpoint doesn't match the bucket. Only relevant outside Amazon S3, or if you've moved a bucket between regions. Confirm the bucket's actual region in your provider's console and make sure it matches what you entered in Drefly, and that the endpoint (if you're not on Amazon S3) is the exact one your provider documents, a typo here fails quietly rather than with an obviously wrong-looking error.
- Public access block settings and CORS aren't the cause of a verification failure. Block Public Access controls whether anonymous, unauthenticated requests reach the bucket, it has no effect on authenticated requests made with a real access key, which is all Drefly's server ever sends. CORS only governs requests made from a browser, it has no effect on Drefly's server side verification either. If "Verify and save" itself is failing, look at the IAM user and bucket policy, not these two settings, CORS is what you set up in the next section, separately, for uploads that happen straight from your customer's browser.
Fastest way to confirm the real cause: reproduce the same call with the AWS CLI using the exact key you gave Drefly, rather than guessing from the error message alone.
aws configure --profile test-key
aws sts get-caller-identity --profile test-key
aws s3api put-object --bucket YOUR_BUCKET --key test.txt --body ./test.txt --profile test-key
An InvalidClientTokenId error means the key itself is wrong or inactive. A plain
403 Forbidden or AccessDenied with a valid identity means the key is real
but lacks permission, work through the IAM policy and bucket policy checks above.
Set up CORS on your bucket
Because recordings upload directly from your customer's browser into your bucket rather than passing
through a Drefly server, your bucket needs a CORS policy that allows requests from your own site's
origin. Without it, the upload (and downloading or sharing a recording later from your dashboard)
will fail with a browser level CORS error even though the credentials are correct. Every provider
listed above has its own CORS settings screen, usually called something like "CORS configuration" or
"CORS policy" in that provider's bucket settings. At minimum, allow the PUT
method from your site's origin (for example
https://app.company-a.com), and allow the Content-Type header, since the
browser sends that with each upload. Your own site's origin only ever uploads a recording, it never
reads one back from the bucket, so GET isn't needed there, it's only needed further down
for developer.drefly.pro. If you widen it while testing, remember to scope the allowed
origins back down to just the domains you actually use once things are working.
Two more origins need to be on that same allow list, and they're easy to miss because they're not
your own domain: https://report.drefly.pro and https://developer.drefly.pro.
Add both alongside your own site's origin, not instead of it. developer.drefly.pro is
where your dashboard runs, and converting, watching, or sharing a recording from that dashboard is a
browser request straight to your bucket, so without it on the allow list those actions fail. If your
widget uses the new page recording mode, that flow opens on report.drefly.pro, and that
page uploads the recording directly to your bucket too. Leave it off the allow list and the recording
won't sync, it never makes it into your bucket at all.
If this step gets missed, Drefly's dashboard will tell you plainly what's wrong rather than leaving you to guess: recording playback still works either way since that doesn't need CORS, but downloading or sharing a recording will show a message explaining that the bucket's CORS settings are blocking browser access from your dashboard's own origin, with the exact origin to add spelled out for you.
Does adding report.drefly.pro and developer.drefly.pro expose the bucket? No. CORS only tells the browser which origins are allowed to read the response of a cross origin request, it isn't the authorization mechanism itself. Every upload, download, or share request from those two origins is a presigned URL that Drefly's server generates on the fly, scoped to one object and one method, and it expires, an hour for uploads and downloads, five minutes for the dashboard's share and stream flow. Your bucket's access key and secret are encrypted at rest on our side and never reach the browser or your page in any form. Adding these origins lets our web apps make already authorized, already expiring requests, it doesn't hand out standing access to your bucket.
Here's a copy paste starting point for the CORS policy itself, split into two rules since your own
site's origin and report.drefly.pro only ever upload, while
developer.drefly.pro also reads and re-uploads share clips. Replace the first origin
with your own site's domain:
[
  {
    "AllowedOrigins": [
      "https://your-site.com",
      "https://report.drefly.pro"
    ],
    "AllowedMethods": [
      "PUT"
    ],
    "AllowedHeaders": [
      "Content-Type"
    ],
    "MaxAgeSeconds": 3600
  },
  {
    "AllowedOrigins": [
      "https://developer.drefly.pro"
    ],
    "AllowedMethods": [
      "GET",
      "PUT"
    ],
    "AllowedHeaders": [
      "Content-Type"
    ],
    "ExposeHeaders": [
      "ETag"
    ],
    "MaxAgeSeconds": 3600
  }
]
Why the split: the widget on your own site and the new page recording flow on
report.drefly.pro only ever issue PUT, they upload a recording, they never
read one back. developer.drefly.pro is your dashboard, it issues GET to
download, watch, and generate share links, and it also issues a second PUT when you
create a share clip, since the browser trims and re-uploads that clip straight to your bucket.
DELETE never appears in this policy at all, deleting a recording from the dashboard goes
through Drefly's own server first, which deletes the object directly using the credentials you gave
us, the browser never makes a delete request against your bucket. HEAD isn't in this
policy either, checked against the widget and dashboard code directly and nothing issues a
HEAD request against your bucket, so it's left out rather than added as unused
overhead. If your own app uses this same bucket for something else outside Drefly, widen the
relevant rule to match, this is just the minimum Drefly itself needs.
Want to know the moment a recording lands? Use your bucket's own event notifications
Drefly doesn't push a notification to your backend when a recording finishes syncing. If you want
one, your bucket provider almost certainly already has this built in, since the object landing under
your storage_prefix is a normal write to your own bucket, nothing about it is
Drefly-specific from the provider's point of view.
No new bucket permissions needed. These are configured on the provider's side,
separate from the CORS policy above, they don't touch AllowedOrigins or
AllowedMethods at all, and they don't require handing out any additional access to
Drefly or to anyone else.
Point the notification at whatever you already use to react to events, an SQS queue, a Lambda, a Pub/Sub subscription, and trigger your own logic off the object key landing under your prefix. Backblaze B2, DigitalOcean Spaces, Wasabi, and self hosted MinIO don't all offer the same native event notification support as the three above, check your specific provider's docs before relying on this.
Allow camera and microphone in your headers
This step only applies if the widget's capture mode is screen, camera, and mic. If your company is set to screen only or screen and mic without camera, skip this section.
A common issue we've seen during integration: the widget loads, the button renders, screen sharing works, but the camera and microphone prompt never shows up. No error, no console warning that mentions Drefly, the browser just quietly denies the request. The visitor's own Chrome site setting for camera and mic can say Ask (default) and it still won't prompt.
The cause is almost always a Permissions-Policy header on your own page, set to
something like this:
Permissions-Policy: camera=(), microphone=(), geolocation=(), payment=()An empty () disables that feature for the entire document, including same-origin
scripts like embed.js, and it's enforced before the browser ever gets to your site's
per-visitor permission setting. This is a common default in security-hardened header configs, helmet.js
defaults, Next.js security-header starter templates, and various "secure headers" snippets people
copy from blog posts. If your team has ever pasted in a hardened headers config or run a security
header scanner and fixed everything it flagged, this is worth checking even if nothing else about the
integration seems wrong.
To check: open devtools console on the page with the widget and look for a line starting with
Permissions policy violation mentioning camera or microphone. The widget also
preflight-checks this itself before asking for camera or mic access, and if it's blocked, shows the
visitor a message naming the actual cause instead of a generic "check your browser settings" message.
The fix is to scope camera and microphone to self instead of
leaving them empty, without removing whatever else your policy already sets:
Permissions-Policy: camera=(self), microphone=(self)self is enough here. embed.js runs as a same-origin script directly on
your page rather than inside a cross-origin iframe, so you do not need to add
*.drefly.pro to this particular header, that's only relevant for the CSP allowlist
mentioned earlier in Embed the snippet. Below are snippets for where
this header usually gets set, pick whichever matches your stack.
server {
    add_header Permissions-Policy "camera=(self), microphone=(self)" always;
}
<IfModule mod_headers.c>
Header always set Permissions-Policy "camera=(self), microphone=(self)"
</IfModule>app.use((req, res, next) => {
res.setHeader("Permissions-Policy", "camera=(self), microphone=(self)");
next();
});module.exports = {
async headers() {
return [
{
source: "/(.*)",
headers: [
{
key: "Permissions-Policy",
value: "camera=(self), microphone=(self)"
}
]
}
];
}
};app.Use(async (context, next) =>
{
context.Response.Headers.Append("Permissions-Policy", "camera=(self), microphone=(self)");
await next();
});@Component
public class PermissionsPolicyFilter implements Filter {
public void doFilter(ServletRequest request, ServletResponse response, FilterChain chain)
throws IOException, ServletException {
HttpServletResponse res = (HttpServletResponse) response;
res.setHeader("Permissions-Policy", "camera=(self), microphone=(self)");
chain.doFilter(request, response);
}
}{
"headers": [
{
"source": "/(.*)",
"headers": [
{
"key": "Permissions-Policy",
"value": "camera=(self), microphone=(self)"
}
]
}
]
}/*
Permissions-Policy: camera=(self), microphone=(self)export default {
async fetch(request) {
const response = await fetch(request);
const newResponse = new Response(response.body, response);
newResponse.headers.set("Permissions-Policy", "camera=(self), microphone=(self)");
return newResponse;
}
};If you proxy your app through Cloudflare and a Transform Rule or Worker there is rewriting response headers, check that layer too, whatever your origin server sends can still get overwritten on the way out. The same applies to any other reverse proxy or CDN sitting in front of your app, the header that matters is the one that actually reaches the visitor's browser, not just the one your app server sends.
Rotating and deleting keys later
Nothing here is a one time setup you're stuck with. You're free to change any of it whenever you need to:
- Rotate the widget's public key - open the snippet overlay for that company and
click Rotate key. This immediately issues a new key and invalidates the old one, so
the snippet already live on your site stops working the moment you rotate, you'll need to update
the
data-keyvalue on your site with the new key right after. Use this if a key ever leaks or you're rebuilding the embed from scratch. - Update or rotate storage credentials - open Connect their storage again for that company and enter new values. The secret key is masked by default, click the eye icon to reveal it if you need to check what's currently saved. Saving new credentials re-verifies access to the bucket the same way the first setup did, and immediately replaces the old key pair, nothing keeps using the previous credentials afterward.
- Remove a company entirely - delete it from the dashboard and the widget's key stops working immediately, so the snippet on that site goes dark right away. Recordings already saved to the bucket are untouched, deleting the widget in Drefly doesn't reach into your storage and remove anything, that's entirely up to you and your own retention rules.
Placement, recording mode, and other config
A couple of settings exist on every widget but don't have a toggle in the dashboard yet, they're still worth knowing about since they're active right now on every widget you create:
- Recording mode - by default, a visitor clicking record sees a quick choice
between "This tab" and "New page" (covered in detail in
Why Use Drefly's Record Tool for
Your
Company). If you'd rather skip that choice and always use the new page flow, that's a config
value called
recording_mode, set toredirect_trackinginstead of the defaultin_page. - Font family - the widget inherits a sensible default font stack. A
font_familyvalue is supported if you want the widget's text to match a specific font your site already loads.
The same ownership model applies to AI insights. Every recording gets a free transcript, summary, and chapter breakdown, and these stay private to your company dashboard by default. A separate Share AI insights toggle on the share modal controls whether a shared link includes them, so nothing goes out to a customer or teammate unless that toggle is turned on.
For the broader picture of what the widget actually does once it's embedded, security, data ownership, and both recording flows, read Why Use Drefly's Record Tool for Your Company. To try the recording experience your customers will see, open the Record tool yourself first.
We'd love your feedback
If a step in this guide didn't match what you saw, a storage provider you use isn't listed, or something in setup tripped you up, we want to know. Reach out any time through the Feedback page or by emailing support@drefly.pro.
Ready to connect your first widget?
Unlock the developer dashboard, add a company, and you'll have a working snippet in a couple of minutes.
Open the developer dashboard